When I read about new and upcoming cafes in the inner west, I am reminded time and time again of how many places I need to check out. There is a part of me that knows I am constantly trying to catch up but not very successful at it though! :(
Even though West Juliett has been open for over a year, I have yet to try it out until now. It was a Saturday and lunch time. My friends and I agreed to meet at around noon but fortunately for me they arrived earlier and put their name down for a table. By the time I got there, lo and behold they were already seated. Now I call this sheer good luck as there were many people hanging around waiting for a table.
After poring over the menu, I took a look inside the cafe and realised how very popular this place was. It was absolutely buzzing and packed with people!
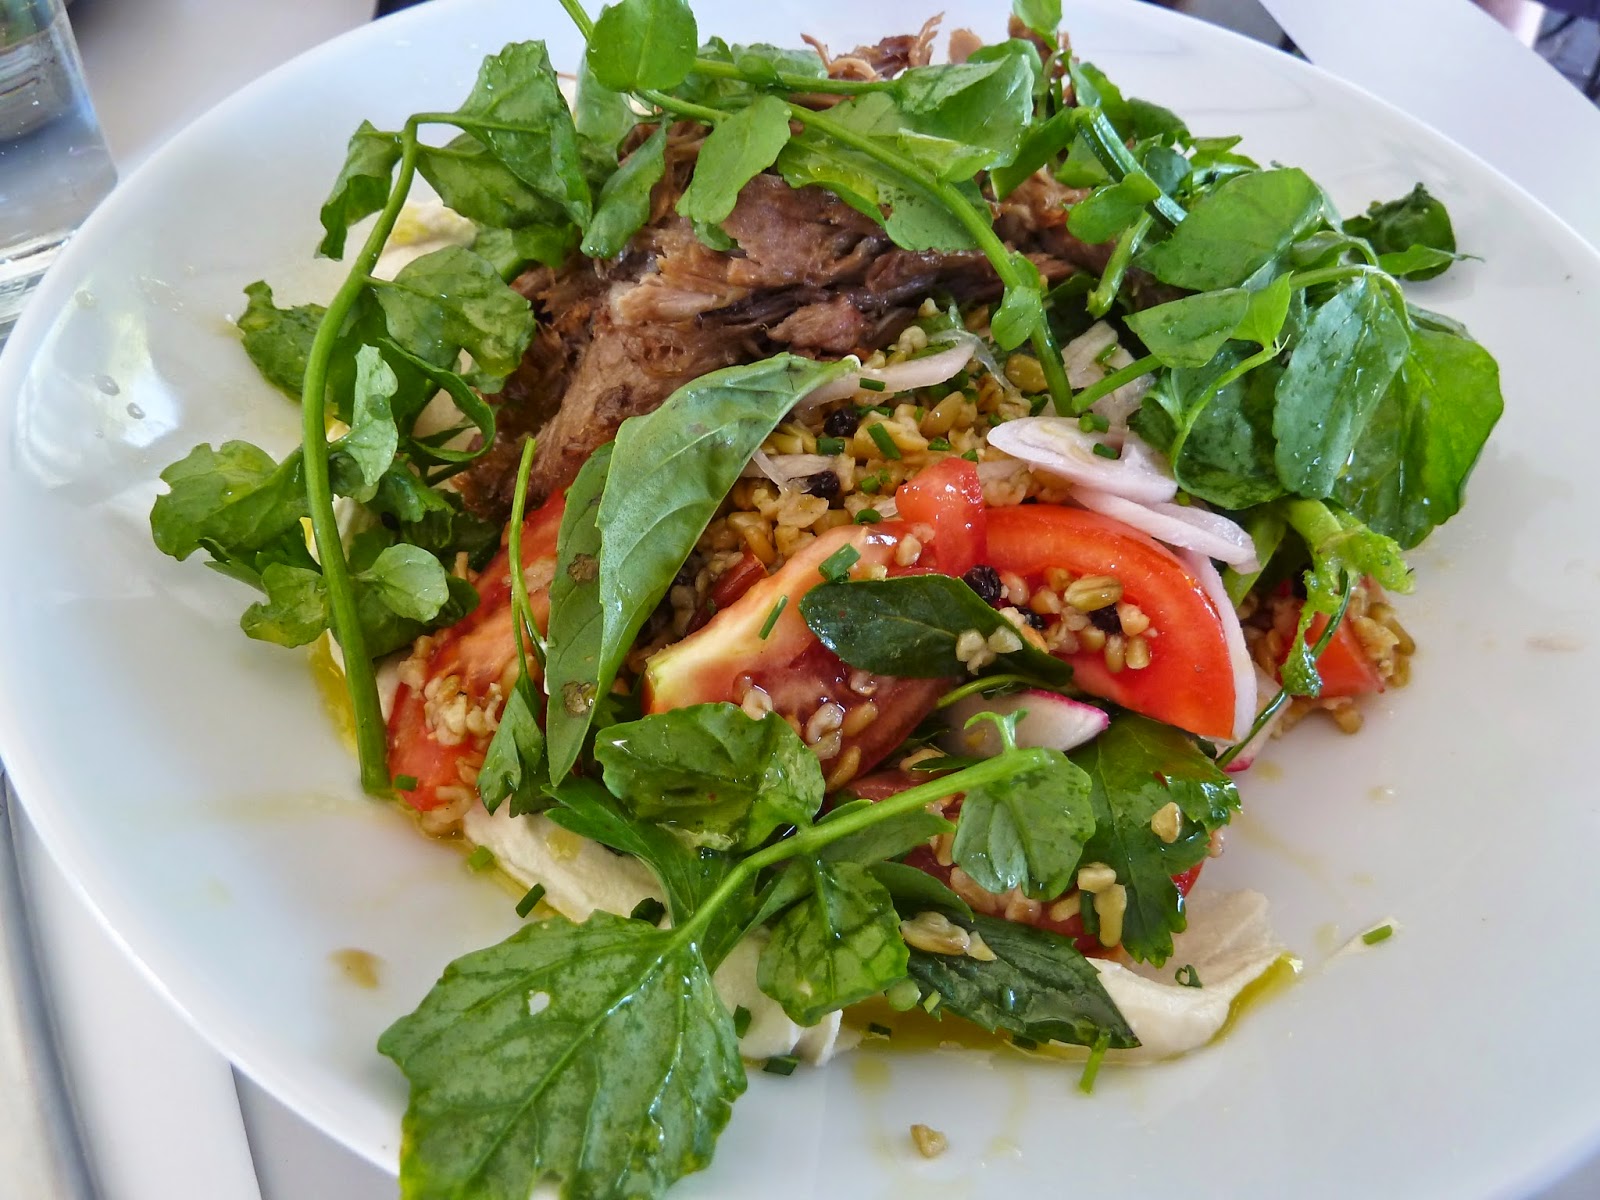
Salad of Lamb shoulder, ripe tomatoes, freekeh, basil, tahini yoghurt, and chilli oil. It looked so fresh and the lamb was tender and delicious.
Grass fed burger, lettuce, cheddar, Dijon, tomato, pickles, mayo and relish. Impressive way to serve a burger, a knife stabbed in the middle of the burger is one way to attract attention! It was a very good burger, the meat patty was nice and pink and juicily tender. And the bun was soft and pillowy.
JM had the burger too but he had a bacon added to the burger and he loved every bite of it!
About Me
- Cindy
- Food is one of my many joys in life. It is a common bond I share among my friends and family. Combining food and travel makes it all the more interesting. I enjoy going out for a good meal with friends and family. The array of various cuisines and our fantastic array of produce really makes Sydney such a great city to live in. Blogging is my hobby and my posts on restaurant meals I have had are paid for and not gratis. Any gratis provided to me will always be stated beforehand.
Showing posts with label Cookies. Show all posts
Monday, 1 December 2014
Sunday, 16 September 2012
White chocolate and macadamia cookies (From Taste website)
I found this recipe from the Taste website and have tried baking it twice. The first attempt wasn't too bad, it was tasty but I felt the cookies looked a little pale and slightly doughy in the middle. This was because I decided to set the oven at 170C instead of the 180C as stated in the recipe. Even with that, my cookies were rated well by all who tasted them.
So I had another go on another weekend and this time, I set the oven to 180C. The cookies turned out beautifully, not doughy at all and had a healthy brown colour to it. I set out to hand them to 3 different sets of friends, all of which came back with 'delicious' as the feedback.
Sunday, 29 July 2012
Yummy Salted Caramel Cookies
My friend CW gave me a little bag of goodies a few weeks ago to try out. They were these delicious Salted Caramel Cookies and I absolutely loved the salty and sweet flavours of the cookies. I couldn't stop eating them.
So when she finally blogged about it, I had to try my hand at baking them. The recipe originates from another blogger The Suz Chef (The Suz Chef's Salted Caramel Cookies) and CW did some minor tweaking to it when she mentioned it in her blog post (WanGirls Salted Caramel Cookies).
Well, I have tried them out and I am happy to say I think I did alright. I made enough to give out a few bags to some friends and the feedback so far has been very positive! One more recipe to add to my list of baking recipes!! The version I made was based on CW's tweaking but a shout out to The Suz Chef for the wonderful original recipe!!!!
Ingredients
175g butter, melted and cooled
2 cups self raising flour
1/4 teaspoon of salt
3/4 cup brown sugar, firmly packed
1/2 cup caster sugar
1 teaspoon vanilla extract (or 1 tbsp vanilla essence)
1 egg + 1 egg yolk
Caramel chips (approx 1 cup)
Salt flakes
Method
1. Preheat over to 170C and line 2 to 3 cookie trays with baking paper.
2. In a bowl, beat the melted butter and the two sugars until well combined.
3. Add the vanilla extract (or essence), the egg and egg yolk, beat again for at least another minute.
4. Sift the flour with the salt into the bowl and beat until all is well combined. This may take another 2 minutes.
5. Add the caramel chips and stir with a wooden spoon to combine.
6. Use a teaspoon to drop balls of batter onto the baking trays. Please ensure they are well spaced as the cookies do spread out during the baking. (Note: If you want jumbo sized cookies, use a tablespoon instead).
7. Add more caramel chips onto the top of the batter (they look quite nice once biscuits are cooked). On average, I added about 2 to 3 more chips on top of each batter drop.
8. Then top with finely ground salt flakes on each cookie.
9. Bake 2 trays at a time in the oven for 5 minutes, then swap the trays from the top rack to the bottom rack and vice versa for another 5 minutes.
10. Remove from the oven, leave to sit in the trays for a few minutes, then transfer to a wire rack to cool down completely.
I ended up baking 5 trays (medium sized trays) and had about 45 cookies. Hope you have as much fun as I had and that you find them delicious too!
Cheers....
So when she finally blogged about it, I had to try my hand at baking them. The recipe originates from another blogger The Suz Chef (The Suz Chef's Salted Caramel Cookies) and CW did some minor tweaking to it when she mentioned it in her blog post (WanGirls Salted Caramel Cookies).
| My first batch of cookies! |
Well, I have tried them out and I am happy to say I think I did alright. I made enough to give out a few bags to some friends and the feedback so far has been very positive! One more recipe to add to my list of baking recipes!! The version I made was based on CW's tweaking but a shout out to The Suz Chef for the wonderful original recipe!!!!
Ingredients
175g butter, melted and cooled
2 cups self raising flour
1/4 teaspoon of salt
3/4 cup brown sugar, firmly packed
1/2 cup caster sugar
1 teaspoon vanilla extract (or 1 tbsp vanilla essence)
1 egg + 1 egg yolk
Caramel chips (approx 1 cup)
Salt flakes
Method
1. Preheat over to 170C and line 2 to 3 cookie trays with baking paper.
2. In a bowl, beat the melted butter and the two sugars until well combined.
3. Add the vanilla extract (or essence), the egg and egg yolk, beat again for at least another minute.
4. Sift the flour with the salt into the bowl and beat until all is well combined. This may take another 2 minutes.
5. Add the caramel chips and stir with a wooden spoon to combine.
6. Use a teaspoon to drop balls of batter onto the baking trays. Please ensure they are well spaced as the cookies do spread out during the baking. (Note: If you want jumbo sized cookies, use a tablespoon instead).
7. Add more caramel chips onto the top of the batter (they look quite nice once biscuits are cooked). On average, I added about 2 to 3 more chips on top of each batter drop.
8. Then top with finely ground salt flakes on each cookie.
9. Bake 2 trays at a time in the oven for 5 minutes, then swap the trays from the top rack to the bottom rack and vice versa for another 5 minutes.
10. Remove from the oven, leave to sit in the trays for a few minutes, then transfer to a wire rack to cool down completely.
| The new Caramel Bits from Nestle! |
Cheers....
Subscribe to:
Posts (Atom)